Configuring an email for your CPBX5 system is crucial for receiving important notifications. These notifications can keep you informed about the following:
- Extension activity: This includes User Portal logins, voicemail-to-email and fax-to-email deliveries
- Cloudphone Desktop and Mobile provisioning.
- CPBX5 notifications: You’ll be alerted about emergency calls made through the system.
- System notifications: Stay updated on license status, disk usage nearing capacity, failed login attempts (Intrusion Detection), RAID issues, and TwinStar jumps (if configured).
How to configure the email settings
Follow these steps to set up an email for notifications in CPBX 5
- In the main menu, go to ADMIN > System Settings > Email Settings.
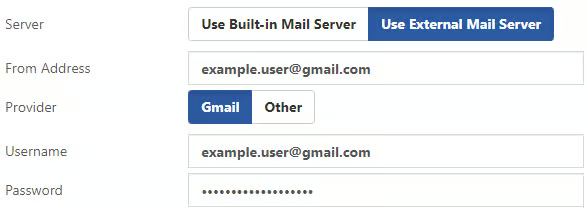
- Choose the Email Delivery Option (Server) between Built-in Mail Server and External Mail Server
3. Configure Email Parameters Based on Server Choice:
- Depending on your selection between Use Built-in Mail Server or Use External Mail Server, configure the following parameters accordingly:
- Built-in Mail Server: Requires you to specify the fully qualified hostname of your CPBX5 server (e.g., pbx.mycompany.com) to ensure accurate identification in email communications. Additionally, define the origin domain, typically matching the server hostname, and specify the parent domain (e.g., mycompany.com) associated with your PBX’s hostname for proper email routing.
- NOTE: It is essential to review your domain settings to ensure compatibility with Postfix and to avoid potential email delivery disruptions.
- NOTE: It is essential to review your domain settings to ensure compatibility with Postfix and to avoid potential email delivery disruptions.
- External Mail Server: Enter the SMTP server details provided by your network-accessible relay server. Adjust the port settings and enable TLS as required by the relay server for secure email transmission. Configure authentication settings according to the credentials provided by your relay server to ensure proper authentication and successful email delivery.
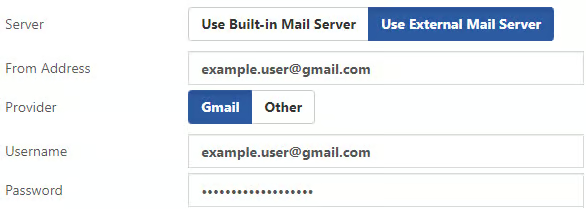
- Provider: You can choose providers like Gmail or other external email services. For Gmail, you only need to provide your Username and Password for authentication.
- Built-in Mail Server: Requires you to specify the fully qualified hostname of your CPBX5 server (e.g., pbx.mycompany.com) to ensure accurate identification in email communications. Additionally, define the origin domain, typically matching the server hostname, and specify the parent domain (e.g., mycompany.com) associated with your PBX’s hostname for proper email routing.
4. Test and Save Settings:

- Proceed to test the configured email settings by sending a test email by entering a valid email address and clicking the icon
- Save your settings after confirming the successful configuration.
5. Check the log messages: View and monitor email event logs for email delivery issues.
6. Click on the Save button to apply the changes.
How to configure email notifications
After setting an email address, you can configure email addresses for system notifications.
- Navigate to the System Misc Module
- In the main menu, go to ADMIN > System Settings > System Misc
- Setup the NOTIFICATIONS Tab
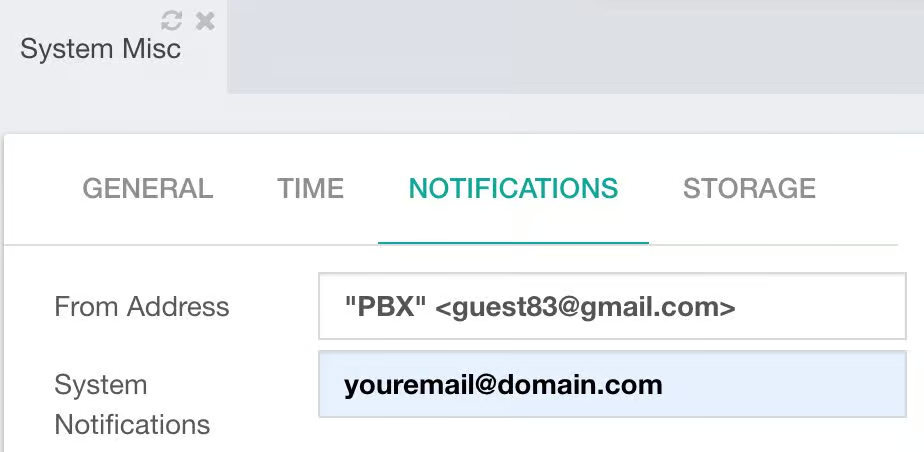
- From Address: Enter the email address that will appear in the “From” field of all email notifications sent by the CPBX5 system. Optionally, prepend a name alongside the “From” email address to make the notifications easily identifiable.
- System Notifications: The email notifications will be sent to the email address you configure here. Example:
- From Address: “PBX” <alerts@yourdomain.com>
- System notifications: yourname@yourdomain.com
With this setup, you will be able to receive email notifications at yourname@yourdomain.com from the sender established as “PBX” <alerts@yourdomain.com>.
3. Click on the Save button to apply the changes.
How to Configure Voicemail-to-Email Message Format
After setting up the email address in CPBX 5, you can customize the format of the voicemail-to-email messages.
1. Navigate to the Email Settings Tab on the Voicemail Settings Module
- Go to SETTINGS > Voicemail Settings and select the Email Settings tab.
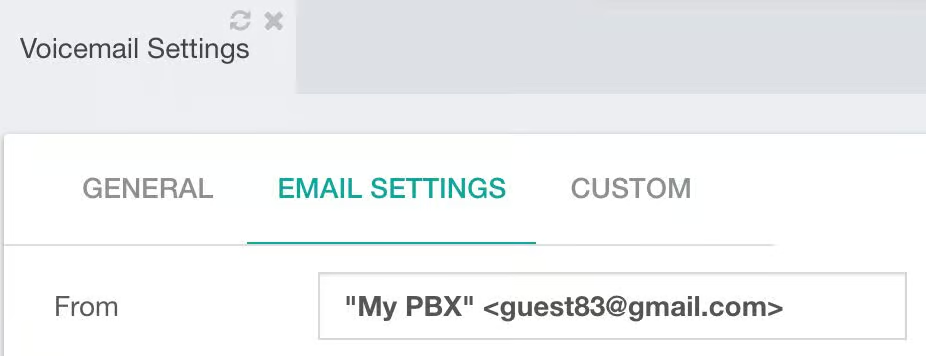
2. Configure the Email Sender (From)
- In the From field, enter the sender’s email address that will appear in the email notification. This is usually the email address of your PBX.
3. Customize the Email Subject
- In the Email Subject field, write the text you want to appear in the email subject line. You can include system-defined placeholders to personalize the content. Here are some of the available placeholders
- $(VM_CALLERID) inserts the caller ID (name and number) of the person who left the message.
- $(VM_CIDNAME) inserts the name of the person who left the message.
- ${VM_CIDNUM} inserts the number of the person who left the message.
- $(VM_DATE) inserts the timestamp of the voicemail.
- $(VM_DUR) inserts the duration of the voicemail.
- $(VM_NAME) inserts the name of the extension receiving the voicemail.
- $(VM_MSGNUM) inserts the sequential number of the message assigned by the phone system.
- $(VM_MAILBOX) inserts the mailbox number of the person receiving the voicemail.

4. Customize the Email Body
- In the Email Body field, write the text you want to appear in the body of the email. You can also use the same system-defined placeholders to include relevant information about the voicemail:
- $(VM_CALLERID) inserts the caller ID (name and number) of the person who left the message.
- $(VM_CIDNAME) inserts the name of the person who left the message.
- ${VM_CIDNUM} inserts the number of the person who left the message.
- $(VM_DATE) inserts the timestamp of the voicemail.
- $(VM_DUR) inserts the duration of the voicemail.
- $(VM_NAME) inserts the name of the extension receiving the voicemail.
- $(VM_MSGNUM) inserts the sequential number of the message assigned by the phone system.
- $(VM_MAILBOX) inserts the mailbox number of the person receiving the voicemail.
- Here is an example of the email body:
Hello $(VM_NAME),You have received a new voicemail from $(VM_CALLERID).
Details of the message:
– Caller Name: $(VM_CIDNAME)
– Caller Number: ${VM_CIDNUM}
– Date and Time: $(VM_DATE)
– Duration: $(VM_DUR) seconds
– Mailbox: $(VM_MAILBOX)
– Message Number: $(VM_MSGNUM)Please find the voicemail attached to this email.
Best regards,
Your PBX System
5. Click on the Save button to apply the changes.
How to set email notifications for intrusion detection
- Navigate to the Intrusion Detection Module
- In the main menu, go to ADMIN > Security > Intrusion Detection
- Configure the GENERAL Tab
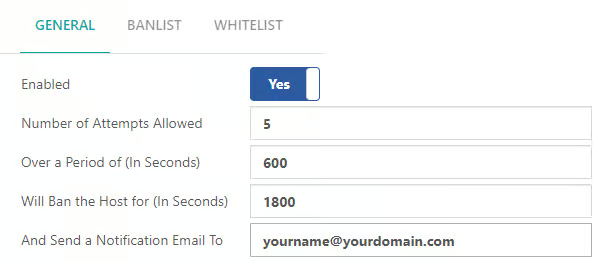
3. Enter the email address to which notifications will be sent each time that a host address is banned in the And Send a Notification Email To field.
4. Click on the Save button to apply the changes.
Email settings example with Gmail as Provider
When you choose Gmail as your email provider for CPBX5 notifications, you’ll need to use an application password for authentication instead of your regular Google account password.
Before you begin: Ensure that you have two-step verification enabled for your Google account. This provides an added layer of security.
How to Set Up:
- Visit your Google account page at https://myaccount.google.com/.
- Sign in to your Google account if you haven’t already.
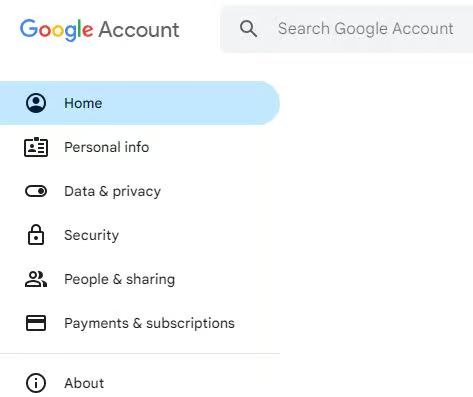
3. In the Search Google Account field, search for “App passwords”
4. Select the App passwords located in the Security Module
5. On the App Password page, type a meaningful name for your app password
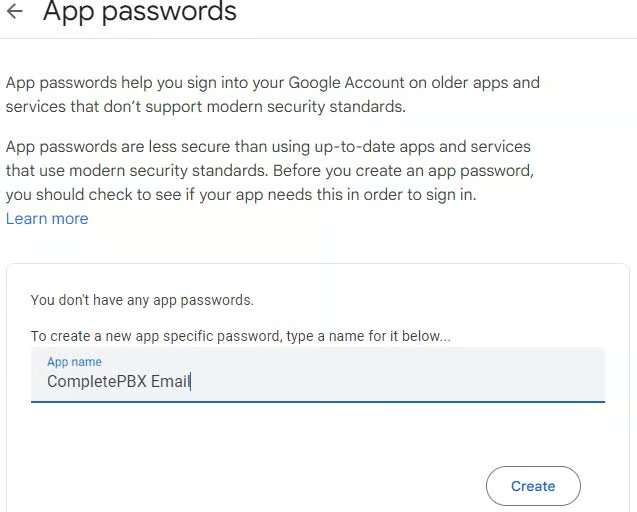
6. Click on the Create button:
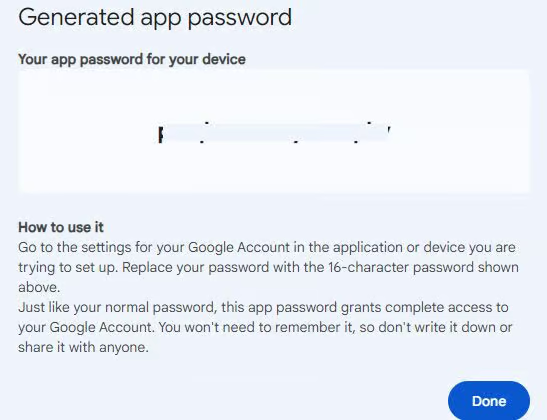
7. Copy the generated app password from Google.
8. Navigate to the Email Settings module in CPBX5 (ADMIN > System Settings > Email Settings).
9. Paste the copied app password into the ‘Password’ field if Gmail is your chosen email provider.
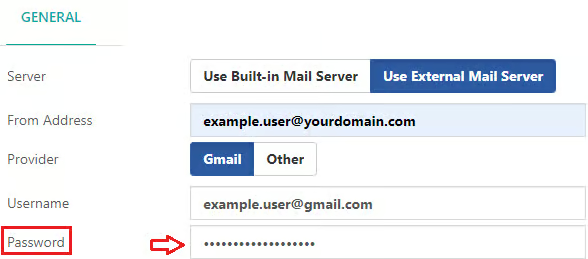
This setup ensures secure authentication for email notifications via CPBX5 using your Gmail account.
